In summary:
- Cold weather temporarily reduces range by up to 40% due to increased internal resistance, but charging a frozen battery causes permanent, irreversible damage.
- Always bring your battery indoors and let it warm to room temperature for at least 1-2 hours before plugging it in. This is the most critical rule.
- For long-term winter storage, keep the battery at a 50-60% state of charge in a temperature-controlled environment (15-25°C).
- A battery’s physical design (screws vs. glue) is a key indicator of its long-term durability and repairability after harsh winter use.
You’ve felt it. That crisp January morning when your fully-charged e-bike, which reliably gave you a 40-mile range in summer, suddenly shows the low-battery warning light after just 25. It’s a frustrating and common experience for any all-season cyclist. The standard advice you hear everywhere is simple: “bring your battery inside” or “don’t leave your bike in the cold.” While not wrong, this advice barely scratches the surface and misses the real, silent killer of e-bike batteries: irreversible chemical damage.
The hard truth is that managing your battery in winter isn’t just about convenience; it’s about preventative maintenance to combat a specific chemical process called lithium plating. This is the permanent damage that occurs when you charge a battery that is at or below freezing temperature. Understanding this and other core principles is the difference between a battery that lasts two seasons and one that powers your rides for five or more.
This guide goes beyond the basic tips. We’re going to pop the hood and look at your battery like a mechanic would: as a piece of high-performance machinery. We will explore the physics of why your range drops, the critical mistake that instantly degrades capacity, and the precise protocols for charging, storing, and even riding that will ensure your investment survives the winter and is ready for spring.
Here, we will break down the essential knowledge every winter e-bike rider needs. From the science of cold-weather chemistry to practical tips for apartment dwellers, this is your complete technical manual for winter battery survival.
Contents: A Mechanic’s Guide to Winter E-Bike Battery Care
- Why Lithium-Ion Batteries Lose 30% of Range Below Freezing?
- How to Store Your Battery Indoors to Prevent Permanent Damage?
- Removable vs Integrated: Which Is Better for Apartment Dwellers?
- The Charging Mistake That Kills Frozen Batteries Instantly
- When to Charge: The Rule for Keeping Voltage Optimal in Storage
- Grid-Tied vs Off-Grid with Battery: Which Setup Survives a Blackout?
- Glue or Screws: Which Product Design Feature signals a Longer Lifespan?
- How to Solve the “Last Mile” Commute Problem Without Sweating?
Why Lithium-Ion Batteries Lose 30% of Range Below Freezing?
That sudden drop in your e-bike’s range isn’t your imagination, and it’s not a sign that your battery is failing. It’s a predictable result of low-temperature physics. At its core, a lithium-ion battery works by moving lithium ions through a liquid electrolyte. When the temperature drops, this electrolyte becomes more viscous, like molasses thickening in the cold. This slowdown dramatically increases the battery’s internal resistance.
Think of it like trying to run through water instead of air. The battery has to work much harder to push the same amount of energy out. This extra effort leads to a phenomenon called voltage sag. Under load, the battery’s voltage drops more than usual, which tricks the Battery Management System (BMS) into thinking it’s running out of power sooner than it actually is. It’s why research from battery manufacturers confirms that a 30-40% range loss is typical at temperatures between -5°C to 0°C (23-32°F).
This can lead to a “false zero” event, where your bike dies mid-ride, but the battery isn’t truly empty. If you bring the seemingly dead battery inside and let it warm up for a couple of hours, you’ll often find it has “magically” recovered 10-20% of its charge. The good news is that this range loss is temporary. The bad news is that how you react to it can cause permanent damage, which we’ll cover next.
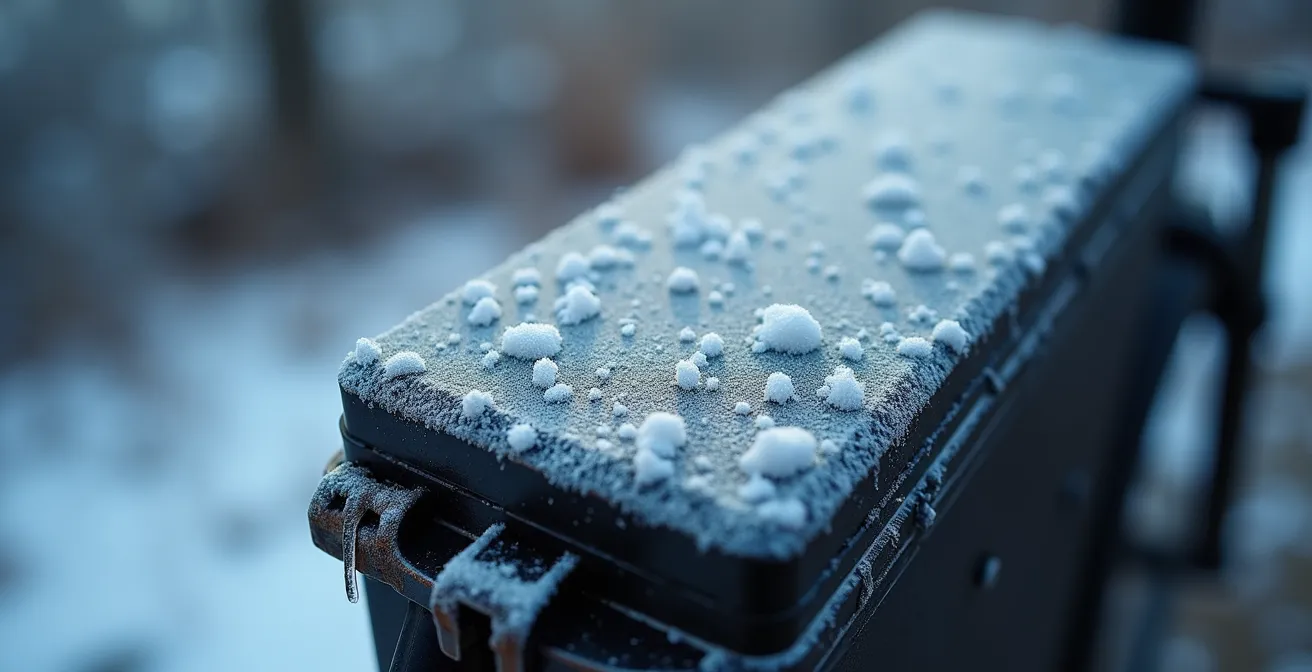
How to Store Your Battery Indoors to Prevent Permanent Damage?
While temporary range loss is an unavoidable nuisance, permanent capacity degradation is the real enemy. The number one defense is proper storage. Leaving your battery on the bike in a freezing garage or shed is one of the worst things you can do, not just for performance but for its long-term health. The goal is to keep the battery within its optimal temperature range, even when not in use.
Battery experts recommend storing Li-ion batteries at a stable, room temperature between 15°C and 25°C (60°F to 77°F). This is the battery’s ‘safe zone.’ Storing it below freezing can stress the internal components and, more critically, sets you up to make the fatal mistake of charging it while it’s still frozen. A dry, insulated location away from direct sunlight or heat sources like radiators is ideal.
Before putting your battery away for a longer period, it’s wise to perform a quick audit. This ensures it’s in the best possible condition for hibernation and that you won’t face any surprises when you’re ready to ride again. This simple checklist helps you prepare your battery for safe and effective winter storage.
Your Pre-Storage Audit Checklist
- Inspect Points of Contact: Check the battery’s charging port and connection points on the bike frame for any dirt, moisture, or corrosion. Clean them with a dry cloth.
- Collect and Inventory: Gather all your charging components—the battery, the charger, and the key. Store them together so nothing gets lost over the winter.
- Check for Case Coherence: Carefully inspect the battery’s plastic casing for any hairline cracks or damage, especially around the seams. A compromised case can let moisture in, which is a major risk.
- Assess Charge Level: Power on the battery to check its current charge. It shouldn’t be full or empty. Aim for the optimal storage level discussed in the upcoming sections.
- Plan Your Storage Spot: Identify a safe, dry, and temperature-stable location in your home. Ensure it’s away from high traffic and potential physical impacts.
Removable vs Integrated: Which Is Better for Apartment Dwellers?
The advice to “bring your battery inside” is simple in theory, but the practicality depends heavily on your bike’s design and your living situation. For cyclists in apartments or homes without a garage, this is where the difference between a removable and an integrated battery becomes starkly apparent.
A removable battery is, by far, the superior choice for winter convenience. You can lock your bike outside or in a cold storage area and simply carry the battery—the bike’s most expensive and sensitive component—upstairs to the warmth and safety of your apartment. This decouples the storage of the bike frame from the storage of its power source.
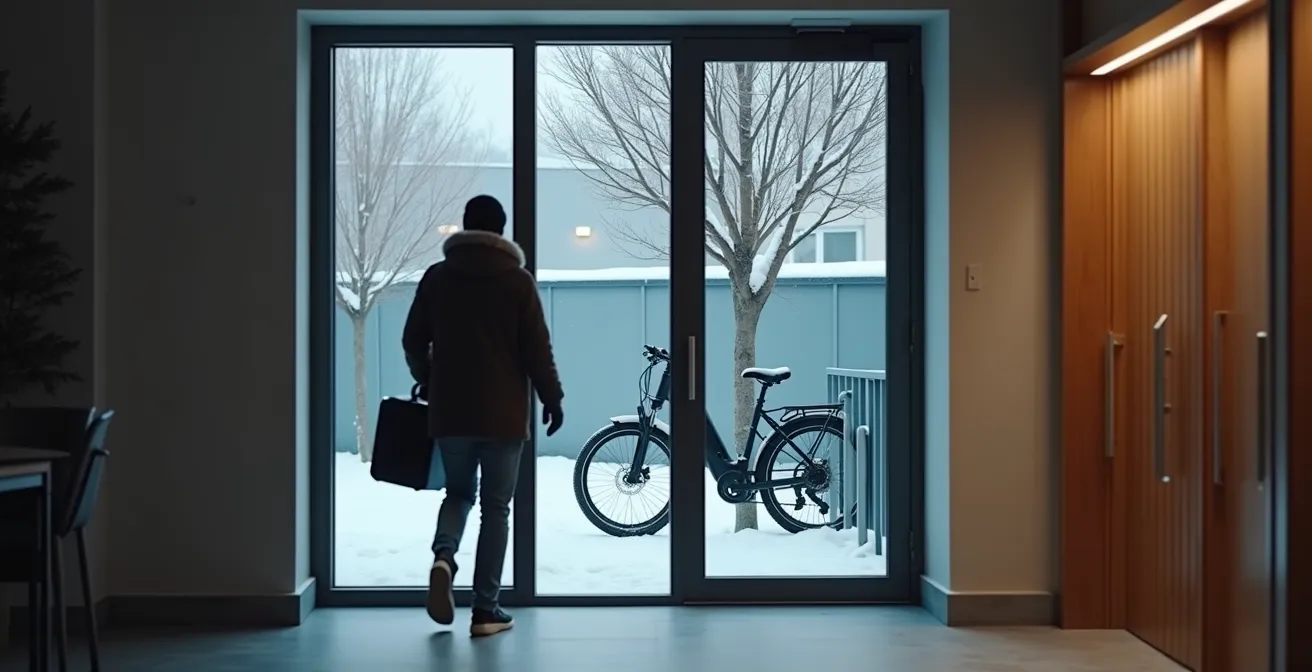
For those with an integrated battery, where it’s built into the downtube, the challenge is significant. You are forced to bring the entire, often heavy and wet, e-bike indoors. This isn’t always feasible or welcome. However, if you have an integrated battery, you’re not out of options. You just need to be more creative. Consider investing in a purpose-built neoprene battery cover. This synthetic rubber material provides insulation, helping the battery retain some of its own heat during a ride and protecting it from the worst of the wind chill. For the truly dedicated, a DIY thermal wrap using foam pipe insulation from a hardware store can also offer a degree of protection.
The Charging Mistake That Kills Frozen Batteries Instantly
If you take only one piece of advice from this guide, let it be this: never, ever charge a frozen battery. This isn’t a minor guideline; it’s the single action that will most quickly and permanently destroy your battery’s capacity. While a cold battery temporarily loses range, charging it while cold inflicts irreversible chemical damage.
Here’s the science, as explained by the Himiway Battery Research Team in their guide on E-Bike Battery Storage and Use During the Winter:
When you charge a lithium-ion battery below 32°F (0°C), lithium ions cannot properly intercalate into the anode’s graphite structure. Instead, metallic lithium plates on the anode surface—a process called ‘lithium plating.’ Lithium plating permanently reduces battery capacity, creates internal resistance, and poses safety risks.
– Himiway Battery Research Team, E-Bike Battery Storage and Use During the Winter
Each time you do this, you are essentially creating a dead spot inside the battery cell. This damage is cumulative and cannot be undone. The impact is not trivial; battery research demonstrates a shocking 35% capacity loss after just 132 charge cycles when charged at 0°C. To avoid this, you must follow a strict, non-negotiable protocol after every single winter ride.
The W-W-C Rule: Warm, Wait, Charge Protocol
- WARM: As soon as you finish your ride, bring the battery into a warm, room-temperature location.
- WAIT: Let the battery sit and acclimate. Do not plug it in. It needs to feel room temperature to the touch, which takes at least 1-2 hours, sometimes longer if it was deeply chilled.
- CHARGE: Only after the battery has fully warmed up should you connect the charger.
This simple three-step discipline is the most important practice for preserving your battery’s health through the winter. Do not rely on your BMS to protect you; it is a last-resort fail-safe, not a feature to be used regularly.
When to Charge: The Rule for Keeping Voltage Optimal in Storage
For riders who put their e-bike away for the winter, storage is not a “set it and forget it” affair. How you store your battery during its hibernation period has a significant impact on its long-term health. The two most common and damaging mistakes are storing it at 100% (fully charged) or at 0% (fully depleted).
Storing a battery at 100% puts the cells under maximum stress, like holding a muscle in constant tension. It accelerates capacity degradation. Storing it at 0% is even more dangerous, as it risks “deep discharge.” The battery will naturally self-discharge over time, and if the voltage drops below a critical level, the BMS may shut it down permanently to prevent damage, rendering it unchargeable.
The ideal condition is what mechanics call a “relaxed, neutral state.” For long-term storage (one month or more), battery management experts specify a 50-60% charge level. This state minimizes stress on the cells and provides a safe buffer against deep discharge. To maintain this, you need a simple monthly check-in.
Monthly Health Check Protocol for Stored Batteries
- Set a Calendar Alert: Create a recurring monthly reminder labeled “Check E-Bike Battery.”
- Check the Charge Level: Once a month, power on the battery and check its state of charge.
- Top Up if Necessary: If the charge has dropped below 40%, plug it in and charge it back up to the 50-60% range. Don’t charge it to full.
- Maintain the “Relaxed State”: This ensures the battery remains in its optimal, low-stress hibernation mode throughout the winter.
- Perform a Quarterly Cycle: Some experts suggest letting the battery run down close to empty and then recharging it to the storage level once every 3 months to keep the cells active.
Grid-Tied vs Off-Grid with Battery: Which Setup Survives a Blackout?
Proper winter battery care yields an unexpected dividend. By diligently keeping your battery indoors and optimally charged, you’ve inadvertently created a personal emergency power station. During a winter storm that causes a power outage, that 500Wh or 750Wh battery isn’t just for your bike; it’s a lifeline. This transforms it from a transportation tool into a piece of off-grid survival equipment.
Unlike a grid-tied solar setup, which shuts down during a blackout for safety reasons, your e-bike battery is a self-contained, off-grid power source. With a simple piece of hardware, you can harness its energy to power essential devices.
Case Study: The E-Bike Battery as an Emergency Power Backup
By connecting their e-bike battery to a small power inverter (a device that typically costs $50-$100 and converts DC power to AC), e-bike owners can create a robust backup system. A fully charged 500Wh battery can power essential LED lights for over 24 hours, fully recharge multiple smartphones several times over, or run a small radio to receive emergency broadcasts. This “off-grid” capability is particularly valuable in winter, when power loss is most dangerous. Furthermore, certain battery chemistries like Lithium Iron Phosphate (LFP) are safe to discharge in a wide range of temperatures, making them practical for emergency use even in cold ambient conditions.
This capability provides peace of mind and adds another layer of value to your e-bike investment. The discipline of winter battery maintenance ensures that when you need it most, your power source is ready, reliable, and waiting safely indoors, unaffected by the grid’s status.
Glue or Screws: Which Product Design Feature signals a Longer Lifespan?
When you’re fighting a battle against winter’s effects, you want equipment that is serviceable. The physical construction of your battery case is a major, yet often overlooked, feature that signals its potential for a long life. The key difference comes down to a simple design choice: is the case held together with screws or is it permanently glued shut?
A screwed case is a hallmark of a higher-quality, repair-first design philosophy. It means a technician can open the case to diagnose issues, replace a faulty BMS, or even swap out degraded cells. After a harsh winter, if one component fails due to cold stress or moisture ingress, the battery can potentially be repaired. A glued or sealed case, on the other hand, is a ‘black box.’ While it may offer a slightly higher IP rating for water protection, any internal failure means the entire unit becomes a disposable item. There is no option for repair.
This trade-off between ultimate weather sealing and long-term serviceability is a critical factor for an all-season cyclist. The following table, based on an analysis of winter battery management, breaks down the impact.
| Design Feature | Screwed Case | Glued/Sealed Case | Winter Impact |
|---|---|---|---|
| Repairability | Cells/BMS replaceable | Entire unit disposal | Cold stress failures fixable vs total loss |
| Water/Dust Protection | IP65 typical | IP67+ possible | Trade-off for winter slush protection |
| Inspection Capability | Can check for damage | Black box – no access | Can check for cracks where moisture could get beyond seals after winter |
| Cost Implication | Higher initial, lower long-term | Lower initial, replacement required | Winter damage more costly with sealed units |
After a winter season, it’s crucial to inspect any battery case, but especially a sealed one, for signs of cracking where moisture could have gotten past the seals. If you see any, you must consult an expert before using it again. A screwed case gives you and your mechanic the power to act on what you find.
Key Takeaways
- The golden rule: Always warm a cold battery to room temperature for 1-2 hours BEFORE charging it to prevent permanent damage from lithium plating.
- For long-term winter storage, maintain your battery in a “relaxed state” at 50-60% charge, checking it monthly in a temperature-controlled environment.
- To maximize range on cold days, use a “first mile” warm-up routine: start with high assist for 5 minutes to generate internal heat, then drop to eco mode for efficiency.
How to Solve the “Last Mile” Commute Problem Without Sweating?
While many commuters worry about the “last mile” of their journey, a winter e-bike mechanic will tell you the secret to a successful cold-weather commute lies in the “first mile.” How you begin your ride is what determines your battery’s performance for the entire trip. Attempting to draw heavy power from a stone-cold battery is inefficient and stressful for the cells.
The goal is to gently bring the battery up to its optimal operating temperature. Remember, field testing indicates that batteries may exhibit up to 50% range loss in extreme cold. A proper warm-up strategy can help mitigate this. Instead of starting your ride in eco-mode to conserve power, do the opposite. This intentional, controlled warm-up generates internal heat, lowers the battery’s resistance, and unlocks more of its available power for the rest of your commute.
By focusing on warming the battery in the first five to ten minutes, you ensure it operates more efficiently for the remaining journey, effectively solving the “last mile” problem before it even begins. It’s a counter-intuitive but highly effective technique for any serious winter cyclist.
Your Winter “First Mile” Battery Warm-Up Strategy
- Start Gentle: If you stored your bike in the cold, avoid tackling steep hills or using full throttle from a standstill. Ride on a flat surface for a few minutes first.
- Boost Assist Initially: Use a higher-assist mode (like ‘Turbo’ or ‘Sport’) for the first 5-10 minutes of your ride. This intentional power draw acts like a warm-up, generating internal heat in the battery cells.
- Switch to Eco Mode: Once the battery is warmed up, drop your assistance level down to ‘Eco’ or ‘Touring’ to maximize efficiency for the remainder of your trip.
- Distrust the Display: Your ‘distance-to-empty’ or range estimator will be notoriously inaccurate in the cold. Use it as a rough guide only and rely on your knowledge of the route.
- Plan Bailout Points: On very cold days, know where potential warm-up spots are along your route, like a coffee shop or bus stop, just in case you experience significant, unexpected range loss.
By treating your e-bike battery not as a simple consumable but as a sophisticated piece of equipment, you can take control of its health and performance. Applying these preventative, science-backed principles ensures your investment is protected from the harshness of winter, guaranteeing you have a reliable and powerful ride ready for the first signs of spring. Now, evaluate your own storage and charging habits and implement these protocols today.