The greatest myth in home design is the “perfect” floor plan; the reality is that a truly future-proof home is an adaptable system, not a static layout.
- Instead of a cavernous open plan, implement “Zoning Dynamics” using furniture and acoustic layers to create flexible, separable spaces.
- Plan for future changes with “Structural Pre-provisioning” to avoid budget-breaking surprises when it’s time to adapt your space.
Recommendation: Treat your floor plan not as a finished product, but as the first phase of a 10-year strategic project that evolves with your family’s life chapters.
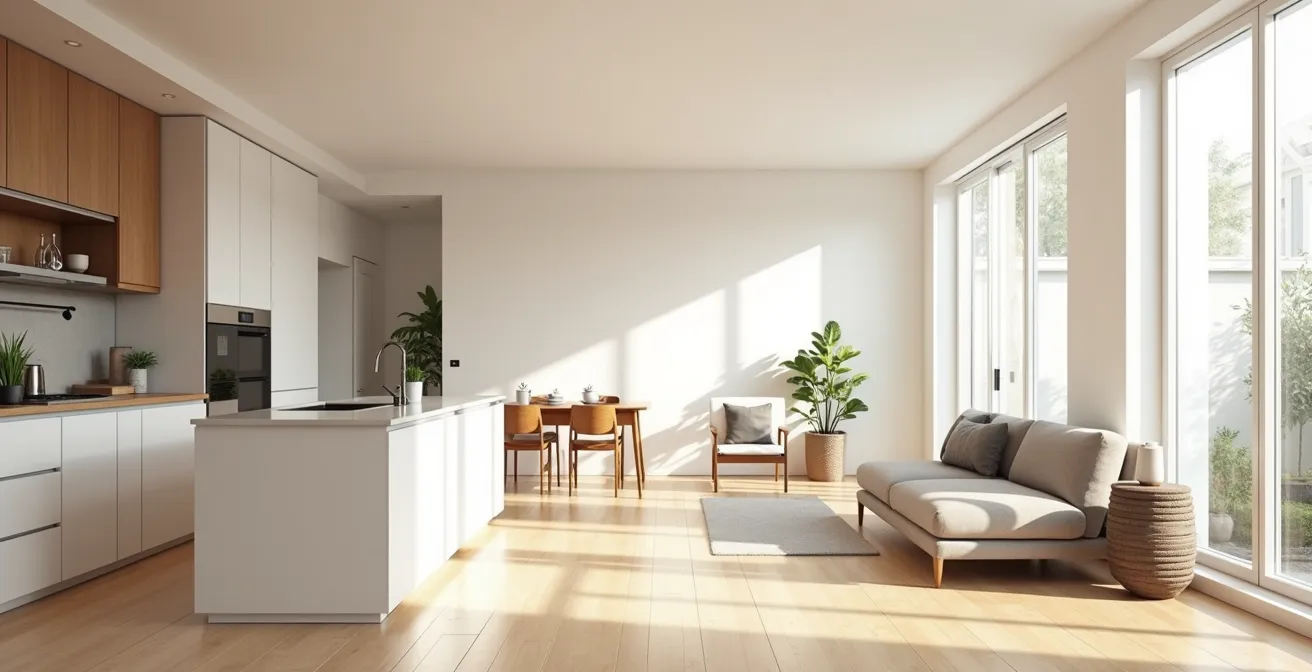
As a young couple planning your forever home, your vision is filled with light, laughter, and space to grow. The dominant advice you’ll hear is to embrace the open-concept layout—a vast, communal area perfect for watching a future toddler play from the kitchen. This ideal is powerful, but it’s based on a snapshot in time. The needs of a family with a newborn are profoundly different from one with a teenager seeking privacy, or one caring for an aging parent who needs accessible, quiet quarters. The static floor plan, no matter how beautiful today, often becomes a source of daily friction within five years.
The conventional approach focuses on picking a layout. Our focus, as architects of family life, must be different. The secret to a home that serves you for a decade or more isn’t finding a single perfect configuration. It’s about designing a flexible spatial system from the very beginning. This means thinking in terms of “Zoning Dynamics,” the “Choreography of Movement,” and “Spatial Phasing.” It’s about building in the capacity for your home to evolve gracefully alongside your family’s predictable life chapters, transforming from a playground for toddlers to a haven for teenagers without requiring a financial or emotional crisis.
This guide moves beyond generic advice. We will deconstruct the common pitfalls of static design and provide a strategic framework for architecting true adaptability. You will learn how to map your home’s flow, evaluate the long-term value of flexible rooms, and understand the critical order of renovations. By shifting your mindset from a fixed floor plan to an evolving home system, you can create a space that doesn’t just house your family, but grows with it.
This article provides a detailed roadmap for creating that adaptable home. We’ll explore the strategic principles that allow a space to evolve, from managing acoustics in open areas to the crucial sequencing of renovation projects. The following sections break down each component of this forward-thinking approach.
Summary: How to Plan a Floor Layout That Grows with Your Family
- Why Your Open Plan Might Become a Nightmare When the Baby Starts Walking?
- How to Map Traffic Flow to Avoid Bottlenecks in the Hallway?
- Guest Room or Home Office: Which Layout Adds More Resale Value?
- The “Load-Bearing” Mistake That Can Bankrupt Your Renovation Project
- In What Order Should You Renovate Rooms to Minimize Disruption?
- Why Your Open Living Room Sounds Like a Cafeteria When Guests Arrive?
- Why Custom Cabinets Cost 40% More Than Stock but Double Your Storage?
- How to Choose a Convertible Sofa for Daily Sleep Without Back Pain?
Why Your Open Plan Might Become a Nightmare When the Baby Starts Walking?
The allure of the open-plan home is undeniable: a single, light-filled space where you can cook, a toddler can play, and the family feels connected. Indeed, research shows that open-concept homes can foster more communal environments. However, this idyllic scene quickly unravels when that walking baby becomes a noisy toddler, a TV is competing with a phone call, and there is no acoustic or psychological separation. The very “openness” that felt liberating now creates a constant, low-level sensory overload. The clatter of pots and pans becomes the soundtrack to a business call, and there’s no quiet corner for a nap or focused homework.
The solution isn’t to build walls, but to implement Zoning Dynamics. This architectural strategy involves creating distinct functional zones within a larger open space without permanent barriers. Think of it as creating “rooms without walls.” This is achieved through a multi-layered approach. You can create “soft zones” using large area rugs and intentional furniture arrangements to visually and acoustically define a living area from a dining space. A strategically placed, large bookcase can act as a natural sound barrier and visual divider, creating a semi-private reading nook.
For more robust separation, consider Structural Pre-provisioning. During the initial build or renovation, you can install the frame for a future pocket or barn door inside a wall. For years, the opening remains wide and seamless. But when the need for privacy arises, installing the door becomes a simple, non-structural weekend project rather than a dusty, expensive ordeal. This foresight transforms a potential nightmare into a planned, graceful adaptation.
How to Map Traffic Flow to Avoid Bottlenecks in the Hallway?
A floor plan’s success is often determined not by its grand spaces but by its transitional ones: the hallways, entryways, and passages. A poorly designed traffic flow creates daily friction, turning the morning rush into a chaotic ballet of collisions. The key is to think like a city planner and design a Choreography of Movement for your home, anticipating primary, secondary, and even tertiary paths for different activities.
The most common bottleneck is the main entryway, which often tries to serve too many functions at once. A powerful solution is to create distinct “Drop Zones” and “Landing Zones.” The Drop Zone is a high-traffic, utilitarian space, typically near a garage or back entrance, designed to absorb the daily chaos of coats, backpacks, and muddy shoes. The Landing Zone, by contrast, is the formal front entry, which remains clutter-free and welcoming for guests. A family with three children successfully implemented this by redesigning their layout to separate these functions, completely eliminating their morning bottlenecks.
This principle extends to the heart of the home: the kitchen. The classic “work triangle” (sink, stove, refrigerator) is a time-tested concept for efficient cooking. However, in a family home, this triangle often intersects with the main family traffic path, leading to constant interruptions and safety hazards. An evolved layout establishes the work triangle as a protected zone and creates a separate, clear bypass lane for family members to pass through the kitchen without entering the primary cooking area.
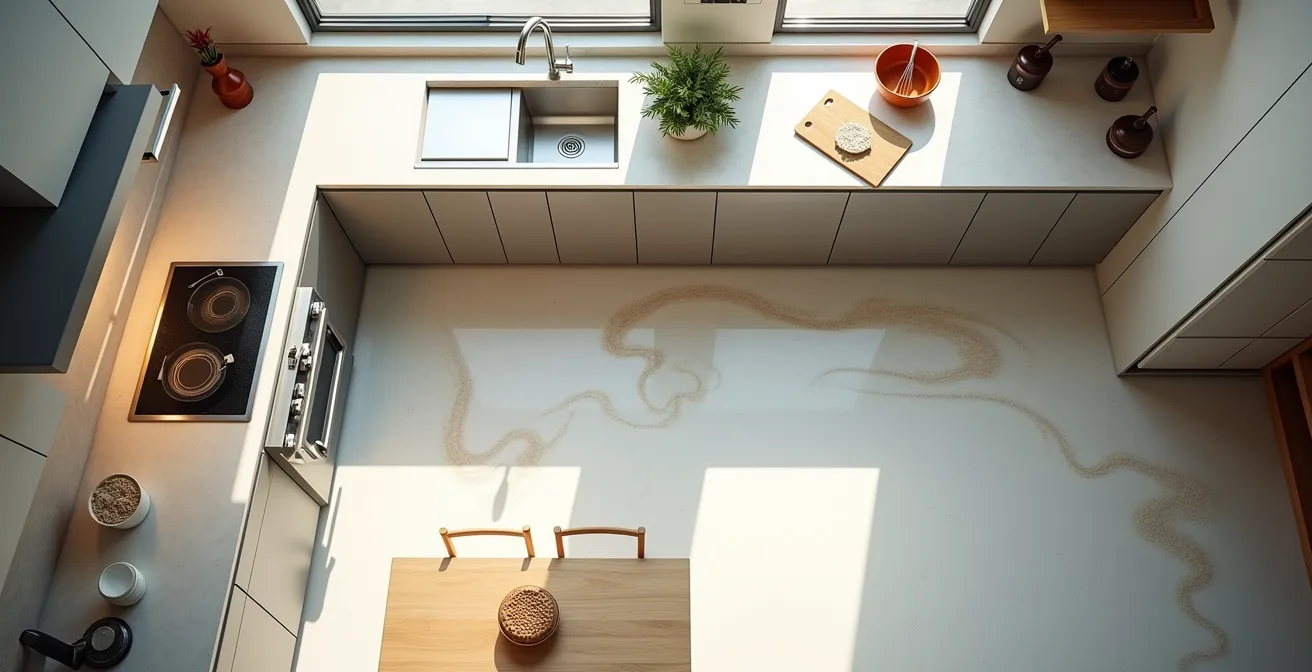
As this diagram illustrates, the goal is to create dedicated “lanes” for different activities. The chef’s path should be compact and uninterrupted, while the path for a child grabbing a snack from the fridge should not cross the hot stove area. This intentional mapping prevents daily frustration and makes the space safer and more functional for everyone.
Guest Room or Home Office: Which Layout Adds More Resale Value?
For a growing family, a flexible room that can adapt to changing needs is invaluable. Today it might be a home office, in two years a nursery, in ten a guest suite for aging parents. The question is, which configuration offers the best return on investment (ROI)? The answer lies not in the room’s current label, but in its potential. This is the concept of Flex-Value: the added resale value derived from a room’s built-in adaptability.
A ground-floor room that can legally function as a bedroom is the gold standard of Flex-Value. It dramatically broadens your home’s appeal to multi-generational buyers or those planning for their own future mobility needs, who may require a bedroom that doesn’t involve stairs. As designer Emily Henderson notes, planning for this potential from the start is a massive value-add. This means ensuring the room has a closet and is near a full bathroom.
The initial setup cost directly correlates with the potential resale impact. A simple convertible den is the most affordable but offers the lowest value increase, while a fully detached suite with a separate entrance provides the highest return but requires a significant upfront investment. An integrated office with a high-quality Murphy bed and built-ins often represents the sweet spot for many families.
This table breaks down the typical costs and returns associated with different flex room configurations, based on a recent analysis of home layout values.
| Room Type | Setup Cost | Resale Impact | Key Features |
|---|---|---|---|
| Integrated Office | $8,000-$12,000 | +3-5% home value | Murphy bed, built-ins |
| Detached Suite | $15,000-$25,000 | +5-8% home value | Separate entrance, bathroom |
| Convertible Den | $5,000-$8,000 | +2-4% home value | Glass doors, sleeper sofa |
Ultimately, the best choice depends on your 10-year plan. If aging parents are a likely scenario, investing in a layout that can become a ground-floor suite offers the greatest long-term financial and functional security.
The “Load-Bearing” Mistake That Can Bankrupt Your Renovation Project
Every homeowner planning a renovation learns to fear two words: “load-bearing wall.” The prospect of moving a structural element brings visions of massive steel beams and spiraling costs. While this is a valid concern, the myopic focus on load-bearing walls is a dangerous oversimplification. The truly bankrupting mistakes often hide where you least expect them: within your home’s mechanical systems.
Understanding the hierarchy of reconfiguration costs is essential for smart planning. Cosmetic changes like paint and fixtures are Tier 1—cheap and easy. Moving non-structural walls is Tier 2. Dealing with load-bearing walls is Tier 3, a significant but generally predictable expense. The real budget-killers are in Tier 4: your plumbing and HVAC systems. In fact, renovation experts warn that moving a main plumbing stack (the large vertical pipe that carries waste) or a primary HVAC trunk line is often far more complex and costly than inserting a beam for a structural wall.
This is where Structural Pre-provisioning becomes a financial lifesaver. When designing your “forever” home, work with your architect to locate these critical mechanical arteries thoughtfully. Can the main plumbing stack be placed in a wall that you know will never move, like one bordering a staircase? Can the HVAC system be designed with future additions or reconfigurations in mind, perhaps by including capped-off ducts that can be easily extended later? These decisions cost little to nothing upfront but can save you tens of thousands of dollars and weeks of disruption down the road when you decide to add a second-floor bathroom or reconfigure the basement.
In What Order Should You Renovate Rooms to Minimize Disruption?
A renovation is inherently disruptive, but the level of chaos can be managed with a professional strategy known as Spatial Phasing. Instead of renovating room by room based on whim, this approach follows a logical order that minimizes dust, disruption to essential services, and the duration of the project. It’s about containing the mess and maintaining a livable sanctuary for your family throughout the process.
The golden rule is to work from the inside out and the top down. This means tackling the messiest and most fundamental systems first. Phase 1 is always Infrastructure: complete all major HVAC, plumbing, and electrical updates before a single wall is painted. This prevents having to tear open finished walls later. Phase 2 focuses on the Core Service Rooms—the kitchen and bathrooms. While renovating these high-impact rooms is disruptive, getting them done early means your home’s most essential functions are restored quickly.
Only then do you move to Phase 3: the “Dry Rooms.” Bedrooms, living areas, and offices are renovated last. This work is generally cleaner and less disruptive, allowing you to live more comfortably during the final stages. A key part of this strategy is to designate one room—a bedroom or a den—as the “Sanctuary Zone,” keeping it completely untouched and clean until the very end. It becomes your family’s escape from the dust and disarray.
Your Phased Renovation Blueprint: A Checklist for Minimizing Chaos
- Phase 1 – Infrastructure First: Complete all HVAC, plumbing, and electrical system updates across the entire project scope before any finishing work begins.
- Phase 2 – Core Service Rooms: Renovate the kitchen and main bathrooms next. These are high-traffic, essential rooms; getting them functional is a priority.
- Phase 3 – The “Dry” Rooms: Update bedrooms, living areas, and home offices last. This work is cleaner and allows you to live in the home with less disruption.
- Phase 4 – Create a Sanctuary Zone: Designate one room to be left completely untouched until the very end. This provides a clean, dust-free escape for your family.
- Phase 5 – Exterior-In for Additions: If adding on, complete at least 90% of the new construction from the outside before breaking through to the existing house to contain the mess.
By adopting this professional sequence, you transform a potentially chaotic ordeal into a structured, manageable project.
Why Your Open Living Room Sounds Like a Cafeteria When Guests Arrive?
You’ve designed a beautiful open-concept great room, perfect for entertaining. But when more than five guests arrive, the conversation devolves into a cacophony. The sound bounces off the hardwood floors, expansive windows, and high ceilings, forcing everyone to speak louder and creating an environment that feels more like a bustling cafeteria than an intimate gathering. This is the acoustic pitfall of large, open spaces with too many hard, reflective surfaces.
The problem is a lack of sound absorption and diffusion. In a traditional room with walls, sound is contained and dampened. In an open plan, sound waves travel freely, reflecting and amplifying. The solution, once again, lies in Zoning Dynamics, but this time applied for acoustic purposes. You need to introduce soft materials and irregular surfaces to break up and absorb sound waves. This doesn’t require unsightly foam panels on the walls.
Start with the foundation: a large, thick area rug with a quality pad underneath is the single most effective first step. Next, consider your window treatments; heavy drapes are far more effective at dampening sound than hard blinds. Upholstered furniture—sofas, armchairs, ottomans—act as giant sound sponges. Even a large piece of canvas art or a textile wall hanging can make a noticeable difference. The goal is to layer textures and materials to combat the echo.
Case Study: Acoustic Zoning in an Echo-Prone Great Room
A family was struggling with the noise levels in their expansive great room. Instead of building walls, they applied acoustic zoning principles. They strategically positioned a large, full bookshelf perpendicular to a long wall, creating a physical and acoustic barrier that established two distinct conversation zones. This single move, combined with the addition of a plush area rug and more upholstered furniture, acted as a series of “sound baffles.” The result was a measured reduction in ambient noise levels by approximately 40%, transforming the room’s feel without any construction.
By thoughtfully adding these sound-absorbing elements, you can tame the cafeteria effect and reclaim the intimate, comfortable atmosphere your open space was always meant to have.
Why Custom Cabinets Cost 40% More Than Stock but Double Your Storage?
When renovating a kitchen or building storage, the choice between stock, semi-custom, and fully custom cabinets seems like a simple budget decision. Stock cabinets are affordable and available immediately, making them a tempting choice. However, for a home designed to evolve, this is often a false economy. Custom cabinetry, while more expensive upfront, is not a luxury—it’s a strategic investment in spatial efficiency that can effectively double your usable storage within the same footprint.
The magic of custom lies in its ability to eliminate wasted space. Stock cabinets are mass-produced in standard sizes, typically in 3-inch increments. Any leftover space in a cabinet run is filled with useless “filler panels.” Custom cabinets are built to the exact dimensions of your room, utilizing every last inch. Furthermore, they can extend to the full ceiling height, capturing vertical space that is completely lost with standard cabinets. The result is dramatic: storage efficiency studies reveal that custom cabinets can utilize up to 90% of available space, compared to just 60% for typical stock options.
Beyond simple volume, custom design optimizes ergonomics and accessibility. A case study of a family of five highlights the three dimensions of custom success. They specified custom widths to eliminate all filler panels, custom heights to reach the ceiling, and custom depths, including shallow pantry shelves where items are always visible and never get lost in the back. The result was not just 40% more storage, but a kitchen where frequently used items were placed at ideal ergonomic heights, reducing daily strain and making the space a joy to use.
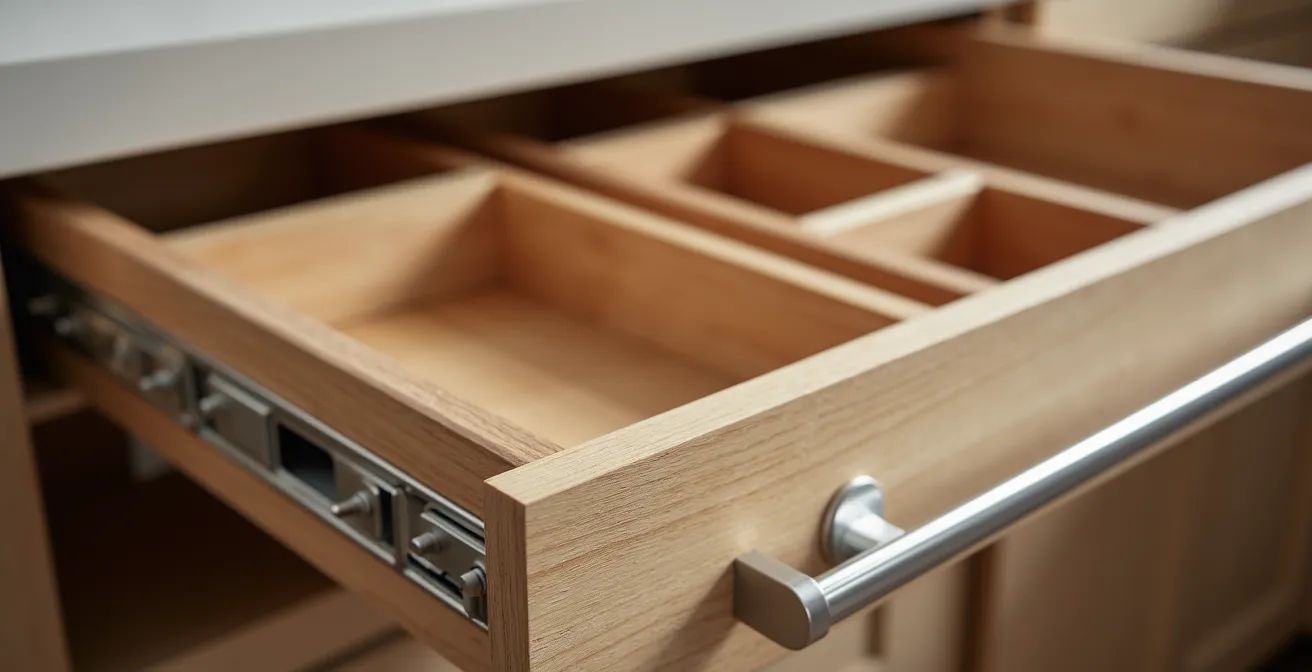
As this detail shows, custom allows for integrated solutions like pull-out drawers, specialized dividers, and corner systems that make every cubic inch accessible. You are no longer fighting your storage; it is working for you. That efficiency is a daily dividend that pays for the initial investment many times over during the life of your home.
Key Takeaways
- A floor plan’s success is measured by its adaptability over time, not its perfection on day one.
- Zoning with furniture and acoustics is more flexible and often more effective than building permanent walls.
- Planning for future changes to plumbing and HVAC during the initial design phase can prevent massive costs later.
How to Choose a Convertible Sofa for Daily Sleep Without Back Pain?
The convertible sofa is the ultimate embodiment of a flexible floor plan—an office by day, a guest room by night. But for many, the experience is defined by a thin, lumpy mattress and a metal bar digging into their back. Choosing a model suitable for daily or frequent use requires looking past the upholstery and focusing on the engineering. It’s not just a sofa; it’s a sleep system.
The most critical element, often overlooked, is the mechanism itself. As one furniture design expert from the House Plans Blog emphasizes:
The mechanism is the number one factor, not the mattress. The standard ‘bar-in-the-back’ pullout is uncomfortable, while superior ‘no-crease’ mechanisms or platform-style sleepers provide genuine daily comfort.
– Furniture Design Expert, House Plans Blog
Look for modern, “no-crease” European-style mechanisms that unfold in a single, smooth motion, keeping the sleeping surface flat and free of bars or hinges. Platform sleepers, which feature a solid base that slides out, also provide excellent, consistent support. When evaluating a potential purchase, perform a durability test:
- Frame Construction: Check if the frame is made from kiln-dried hardwood. This prevents warping and is far superior to particleboard or softwoods.
- Mechanism Smoothness: Open and close the sofa five times. It should operate smoothly without sticking, grinding, or requiring excessive force.
- Leg Sturdiness: Once extended, push down on the corners. The legs should feel solid, with no wobble or give.
- Mattress Support: Ensure the mattress rests on a solid platform or a dense slat system, not a trampoline-like mesh that will sag over time.
- Airflow Design: For daily use, overheating can be an issue. Look for models with innerspring or gel-foam mattresses that offer better breathability than dense memory foam alone.
By prioritizing the mechanical integrity and support system over superficial aesthetics, you can invest in a convertible piece that delivers on its promise of versatility without sacrificing the restorative sleep that is essential for you or your guests.
By applying this strategic, system-level thinking to every aspect of your home, from the overall layout to the individual pieces of furniture, you can architect a space that is truly ready for the next decade of your family’s life.